Design Patterns: Dependency Injection and Factory in Node.js with TypeScript
After a while without posting anything, I'm back fellas :D
This topic is very important to me because I always use this combination of patterns in the applications that I build, and today I will show you guys how to combine them effectively using Node.js and TypeScript.
The Dependency Injection pattern is one of the most used design patterns that allows you to write clean, organized, and testable code. It's good because you can enhance the modularity, testability, and flexibility of your application. This design pattern works well with the Factory pattern. We'll explore how to use both patterns in Node.js with TypeScript.

First of All, What is a Dependency?
Before we dive into Dependency Injection, it’s important to first understand what we mean by dependency in the context of software development.
A dependency is simply any component or service that a class or module requires in order to function. For example, in an application, a service might depend on a database, an external API, or other internal services to perform its tasks. These dependencies are usually objects or services that provide some functionality that the main class doesn’t implement itself.
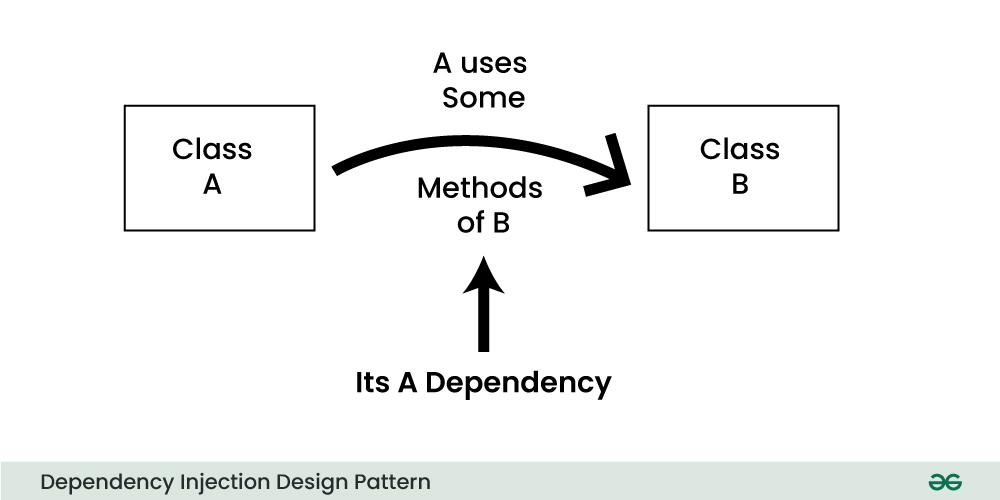
Dependency Injection is a design pattern where an object’s dependencies are provided (injected) from the outside rather than being created by the object itself. This pattern promotes loose coupling between components and makes your application more testable and easier to maintain.
Benefits of Dependency Injection:
Loose Coupling: Components are less dependent on each other, which allows for better flexibility when updating, replacing, or testing components.
Easier Unit Testing: Since dependencies are injected, it’s easy to swap real implementations with mocks or stubs during tests.
Improved Code Maintainability: Since dependencies are passed as arguments, your code is more flexible and easier to extend.
Introducing the Factory Pattern
The Factory pattern is used to instantiate objects, typically when there is a need for multiple classes or components to be created depending on some conditions or configurations. It encapsulates the creation logic and returns an object ready for use.
Benefits of the Factory Pattern:
Separation of Object Creation Logic: The Factory pattern separates the object creation process from the rest of the code, keeping the codebase clean and organized.
Centralized Configuration: You can manage and configure object creation in one place.
Easier to Scale: As your application grows, you can manage different configurations and creation logic without modifying the consumer code.
What is the relation between the Factory Pattern and Dependency Injection?
The Factory Pattern and Dependency Injection (DI) often work hand-in-hand in modern applications to manage object creation and dependency management in a clean and maintainable way. While both patterns focus on improving modularity and decoupling, they complement each other in different ways.
Factory Pattern: The Factory pattern centralizes the creation of objects. It encapsulates the logic needed to instantiate a class or service, often based on certain parameters or configurations. This helps in reducing direct instantiation of objects throughout your code and makes it easier to manage complex creation logic.
Dependency Injection: DI is the pattern that allows for the external provision of dependencies (such as services, repositories, or components) to a class rather than having that class manage the instantiation itself. By using DI, you achieve loose coupling and increase the testability of your components.
How They Work Together:
The Factory Pattern can be used to create instances of services or components, while Dependency Injection can be used to inject these pre-configured objects into other components.
For example, you might use a Factory to instantiate a service that requires configuration or setup. Once created, the Factory can inject that service into the required class, allowing the class to focus on its core logic without worrying about the instantiation process.
In this way, the Factory simplifies the creation of complex objects, and DI ensures that these objects are provided to the classes that need them without manual construction.
How to Implement DI and Factory in Node.js with TypeScript
Let’s walk through a simple Node.js application to see how Dependency Injection and the Factory pattern can be applied.
Folder Structure
1
2
3
4
5
6
7
8
9
10
11
12
13
14
15
16
17
18
19
20
21
22
23
24
25
26
27
28
./src:
  controller
  db
  entities
  factories
  index.ts
  use-cases

./src/controller:
  client-controller.ts

./src/db:
  repositories

./src/db/repositories:
  client-repository-memory.ts
  client-repository-postgres.ts
  client-repository.d.ts

./src/entities:
  client.ts

./src/factories:
  client-factory.ts

./src/use-cases:
  create-client.ts
Create client use case (src/use-cases/create-client.ts)
The use case handles the business logic for creating a new client. It doesn’t care about the specifics of how the data is saved, just that the IClientRepository interface is followed.
1
2
3
4
5
6
7
8
9
10
11
12
13
14
15
16
17
18
19
import IClientRepository from "../db/repositories/client-repository";
import Client from "../entities/client";

type Input = {
    name: string;
    email: string;
    address: string;
    phone: string;
};

export default class CreateClient {
    constructor(readonly client_repository: IClientRepository) {}

    async execute(input: Input): Promise<boolean> {
        const client = new Client(null, input.name, input.email, input.address, input.phone);
        await this.client_repository.save(client);
        return true;
    }
}
Repository implementation (src/db/repositories/client-repository.ts)
Let’s implement the repository. Here’s an example of an in-memory implementation. In this case i’m using an in-memory implementation because i’m reusing the code from my last blog post explaining the Repository Pattern.
1
2
3
4
5
6
7
8
9
10
11
12
13
14
import { IClientRepository } from "./client-repository";
import Client from "../../entities/client";

export default class ClientRepositoryMemory implements IClientRepository {
    private clients: Client[] = [];

    async save(client: Client): Promise<void> {
        this.clients.push(client);
    }

    async findByEmail(email: string): Promise<Client | null> {
        return this.clients.find(client => client.email === email) || null;
    }
}
Setting Up the Controller
The controller will handle HTTP requests and invoke the use case to create clients. As you can see, we need to inject the use-case ou multiple use-cases into the controller and we will do it later using the Factory Pattern.
1
2
3
4
5
6
7
8
9
10
11
12
13
14
15
16
import { Request, Response } from 'express';
import CreateClient from '../use-cases/create-client';

export default class ClientController {
    constructor(private createClientUseCase: CreateClient) {}

    async createClient(req: Request, res: Response): Promise<void> {
        const { name, email, address, phone } = req.body;
        try {
            const success = await this.createClientUseCase.execute({ name, email, address, phone });
            res.status(200).json({ success });
        } catch (error) {
            res.status(400).json({ error: error.message });
        }
    }
}
Using the Factory Pattern to Inject Dependencies
Now, we can use the Factory pattern to inject dependencies. The ClientFactory will instantiate the necessary components and wire them together.
1
2
3
4
5
6
7
8
9
10
11
12
import ClientController from '../controller/client-controller';
import CreateClient from '../use-cases/create-client';
import ClientRepositoryMemory from '../db/repositories/client-repository-memory';

export class ClientFactory {
    static create(): ClientController {
        const client_repository = new ClientRepositoryMemory();
        const create_client = new CreateClient(client_repository);
        const client_controller = new ClientController(create_client);
        return client_controller;
    }
}
Setting Up the Server
Finally, let’s wire everything together in the main index.ts file.
1
2
3
4
5
6
7
8
9
10
11
12
13
14
import express from 'express';
import cors from 'cors';
import { ClientFactory } from './factories/client-factory';

const app = express();
const port = 3000;
app.use(cors());
app.use(express.json());

app.post('/create-user', async (req, res) => await ClientFactory.create().createClient(req, res));

app.listen(port, () => {
    console.log(`Server is running on port ${port}`);
});
Normally in big applications we have several dependencies to inject, dozens of them, if we implement these injections at the server configuration, this file would contain a lot of lines and soon would be unreadable. With a simple “ClientFactory.create().createClient(req, res));” we delegate this reponsability to a factory.
Conclusion
By combining Dependency Injection and the Factory pattern, we can create a scalable, modular application that is easier to maintain and test. DI helps decouple components, making the system more flexible, while the Factory pattern allows for a centralized and clean way to create and manage objects. This combination is especially useful in larger applications where managing complexity is key.
These patterns are fundamental in building robust, clean, and testable applications with Node.js and TypeScript, and their benefits will pay off in terms of maintainability and flexibility as your project grows.